Classic Apple Pie Recipe: Easy, Irresistible Comfort Dessert Guide

Classic Apple Pie Recipe: Easy, Irresistible Comfort Dessert Guide
🌍 Cuisine: American
⚙️ Difficulty: Easy
Ingredients
Nutrition Facts
320
Instructions
- Preheat your oven to 425°F (220°C).
- Peel, core, and slice the apples. Place them in a large mixing bowl.
- Add granulated sugar, brown sugar, flour, cinnamon, nutmeg, salt, and lemon juice to the apples. Toss everything together to combine and coat the apples evenly.
- Roll out one pie crust and fit it into a 9-inch pie plate, trimming the edges if necessary.
- Pour the apple mixture into the pie crust and dot with small pieces of butter evenly on top.
- Cover the pie with the second rolled-out crust. Trim excess dough, then crimp the edges to seal. Cut slits in the top crust to allow steam to escape.
- Brush the top crust with the beaten egg to give it a golden color after baking. Sprinkle with coarse sugar if desired.
- Bake the pie at 425°F (220°C) for 15 minutes, then reduce the oven temperature to 350°F (175°C) and bake for an additional 40-45 minutes, or until the crust is golden brown and the filling is bubbly.
- If the crust edges brown too quickly, cover them with foil to prevent burning.
- Remove the pie from the oven and let it cool on a wire rack for at least 2 hours before serving to allow the filling to set.
- Slice and serve warm or at room temperature. Optionally, serve with vanilla ice cream or whipped cream.
Serving Suggestions
- Serve warm topped with a scoop of vanilla ice cream for a classic combination.
- Add a dollop of freshly whipped cream and sprinkle with cinnamon.
- Pair your slice with a hot cup of coffee or chai tea for a cozy treat.
- Drizzle caramel sauce over the pie for extra indulgence.
- Toast leftover slices and spread with butter for a tasty breakfast.
- Garnish with fresh apple slices and a sprinkle of chopped nuts for a beautiful presentation.
- Serve alongside sharp cheddar cheese for a sweet-savory contrast.
Table of Contents
- Intro
- Ingredient Notes
- Tips & Variations
- Leftovers & Storage
- Behind the Recipe
- FAQ
- Your Turn in the Kitchen

Intro
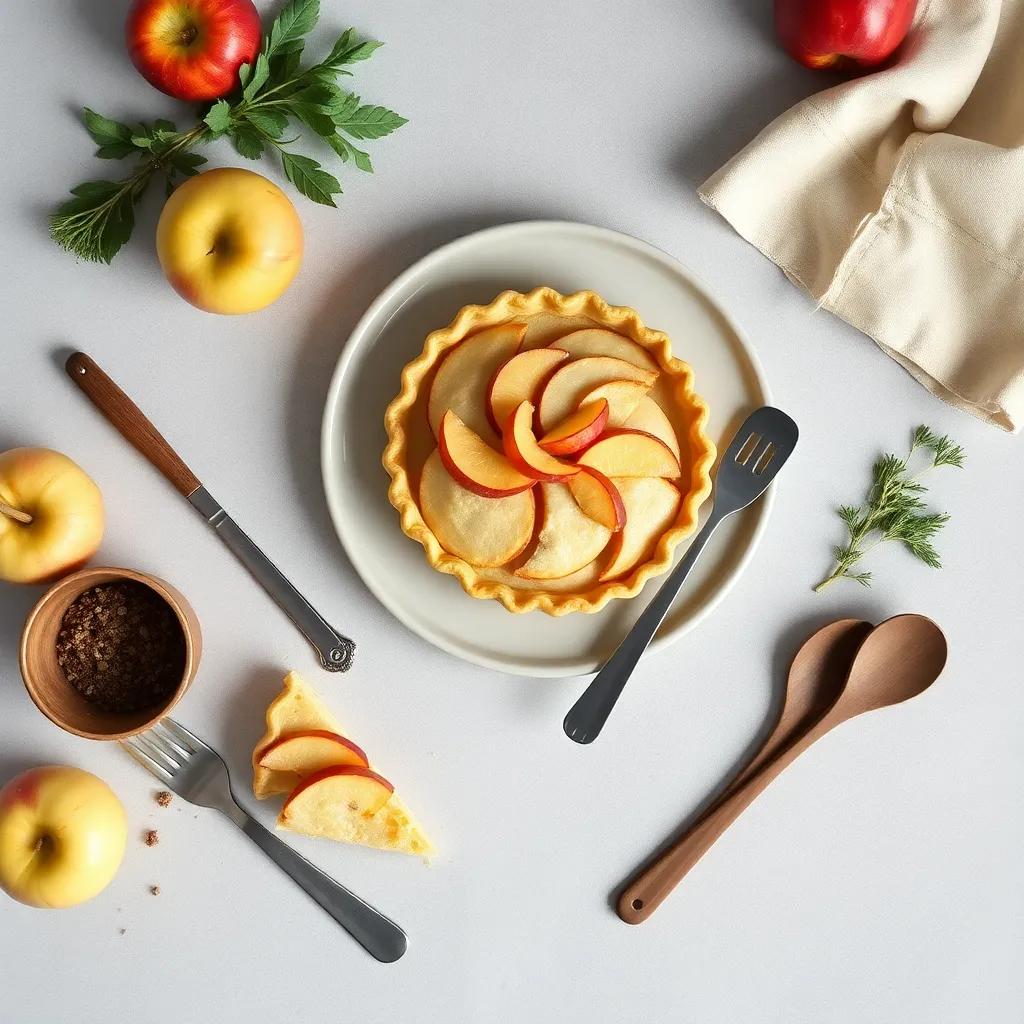
There’s something timeless about a classic apple pie—the way its golden crust encases a tender, warmly spiced filling that’s as comforting as a cozy evening by the fire. This recipe is designed to bring that familiar joy to your kitchen with simplicity and confidence. Whether you’re an experienced baker or trying your hand at pie-making for the first time, you’ll find this guide approachable and rewarding.
Perfect for family gatherings, holiday celebrations, or just an everyday treat to lift your spirits, this apple pie carries the essence of home and tradition without demanding hours of preparation. It’s the kind of dessert that invites everyone to gather around the table, savoring each slice alongside laughter or quiet reflection.
Embracing both convenience and classic appeal, this recipe strikes the perfect balance between fuss-free steps and rich, memorable flavor. From the first buttery bite, you’ll understand why apple pie remains a beloved favorite across generations and seasons. Whether served warm with a scoop of ice cream or simply on its own, it promises to be an irresistible centerpiece for any occasion where comfort food is called for.
Ingredient Notes
When it comes to crafting the perfect apple pie, a few key ingredients truly make all the difference, elevating this dessert from simple to sublime. Understanding their roles and how to select the best versions will set you up for baking success.
Granny Smith Apples:
Renowned for their tartness and firm texture, Granny Smith apples are the foundation of this classic pie. Their bright acidity balances the sweetness and spices, while their crispness holds up beautifully during baking, preventing the filling from turning mushy. When shopping, choose apples that feel heavy for their size with smooth, unblemished skin. If you don’t have Granny Smith on hand, other firm, tart apples like Braeburn or Honeycrisp make excellent substitutes, though the flavor will skew slightly sweeter or milder.
Brown Sugar:
Unlike plain white sugar, brown sugar adds a nuanced molasses undertone that deepens the flavor of the filling and enhances its caramel-like richness. It also contributes a touch of moisture, helping the filling achieve that luscious, tender consistency. For best results, opt for packed light brown sugar unless you want a stronger molasses flavor from dark brown sugar. If you’re in a pinch, a mix of white sugar and a teaspoon of molasses can mimic brown sugar’s complexity.
Lemon Juice:
This small but mighty ingredient serves multiple purposes beyond its bright zestiness. Lemon juice slows down the browning of the apple slices, keeping them looking fresh and appetizing while baking. It also balances the sweetness, lifting the overall flavor and preventing the pie from tasting cloying. Freshly squeezed lemon juice is ideal, but bottled juice can work if that’s what you have—just use sparingly to avoid overpowering the fruit’s natural taste.
All-Purpose Flour:
Often underestimated, a bit of flour sprinkled into the filling binds the juices released by the apples, thickening the filling and preventing it from becoming runny. All-purpose flour strikes the right balance of thickening power without dulling the flavors. For a gluten-free alternative, cornstarch or arrowroot powder can be used instead, though adjust quantities accordingly and add it later in the mixing process to avoid clumping.
By paying close attention to these ingredients—choosing fresh, quality apples, the right sweeteners, and thoughtful thickening agents—you’ll ensure your apple pie emerges from the oven with beautifully balanced flavors and that classic comforting texture everyone craves.
Tips & Variations
To elevate your classic apple pie to bakery-worthy perfection, keep a few expert tips in mind and don’t hesitate to tailor the recipe to suit your taste or dietary needs. Here are some ideas and tricks to inspire your baking adventure:
- Choose Your Apples Wisely: While Granny Smith apples give the pie a signature tartness and firm texture, mixing in one or two sweeter varieties like Fuji or Gala can add complexity and a subtle fruity sweetness. This blend gives the filling multiple layers of flavor and a pleasant variation in texture.
- Prevent a Soggy Bottom: To avoid a mushy crust, consider blind-baking your bottom crust for 5–7 minutes before adding the filling. This step helps set the dough and creates a barrier against excess moisture. You can also lightly brush the crust with a beaten egg white before adding the apples to seal it further.
- Perfect Your Spices: The classic cinnamon and nutmeg combo is irresistible, but feel free to experiment by adding a pinch of ground cloves, allspice, or cardamom for a warming twist. For a more autumnal vibe, stir in a tablespoon of maple syrup or a splash of bourbon into the filling.
- Make It Vegan or Dairy-Free: Swap the butter for plant-based margarine or coconut oil to nail the richness without dairy. For the egg wash, simply brush the top crust with a little almond milk or aquafaba (the liquid from canned chickpeas) to achieve a lovely golden sheen.
- Gluten-Free Options: Replace all-purpose flour with a reliable 1:1 gluten-free baking flour blend to keep the crust tender and flaky. For thickening the filling, tapioca starch or arrowroot powder are excellent gluten-free alternatives to flour, delivering that ideal pie filling consistency.
- Add Texture and Crunch: Incorporate chopped nuts like walnuts, pecans, or almonds into the filling or sprinkle them atop the crust before baking. This adds a delightful crunch and a nutty contrast to the soft apple interior.
- Create a Lattice or Decorative Top: Swap the traditional solid top crust for a lattice design or use small cookie cutters to create fun shapes out of the dough. This not only looks stunning but allows steam to escape, helping your crust stay perfectly crisp.
- Adjust Sweetness to Your Liking: Depending on your apple choice or personal preference, tweak the sugar levels. If you prefer a less sweet pie, reduce the granulated and brown sugars slightly, or boost the tartness with an extra splash of lemon juice.
- Add a Fruity Twist: For something different, fold in a handful of fresh or dried berries—like cranberries, cherries, or blueberries—into the apple filling. Their tangy burst complements the spices and deepens the overall flavor profile.
Remember, apple pie is as much about comforting tradition as it is about creativity. Feel free to experiment and find the version that fills your kitchen with the most joy!
Leftovers & Storage
After baking your classic apple pie, it’s natural to wonder how best to preserve those delicious leftovers for another day—or to enjoy a slice on the go. Proper storage not only keeps your pie fresh and flavorful but also helps retain that signature tender filling and crispy crust.
Storing in the Refrigerator:
Once your pie has cooled completely (ideally at least 2 hours at room temperature), cover it loosely with aluminum foil or plastic wrap to protect it from absorbing fridge odors while allowing some breathability. Stored this way, your apple pie will stay fresh for about 3 to 4 days. When you’re ready to enjoy a slice, warming it gently in the oven at 325°F (160°C) for 10–15 minutes revives that freshly baked texture and releases the inviting aroma of spiced apples.
Freezing for Longer Storage:
If you want to keep your pie beyond a few days, freezing is the way to go. For best results, wrap the entire cooled pie tightly in plastic wrap, followed by a layer of heavy-duty aluminum foil to prevent freezer burn. Alternatively, you can freeze individual slices by wrapping each piece securely—this makes portion control easier and saves reheating time later. Properly wrapped, the pie can last up to 2 months in the freezer without losing much of its deliciousness.
Thawing and Reheating:
When ready to eat frozen pie, allow it to thaw overnight in the refrigerator for the best texture. To reheat, place the pie on a baking sheet and warm in a 350°F (175°C) oven for 15–20 minutes, uncovered, until heated through and the crust turns crisp again. Avoid microwaving if possible, as this often makes the crust soggy and the filling less appealing.
Containers to Choose:
Use airtight containers or pie storage boxes designed for delicate desserts if you’re refrigerating small portions or single slices. For freezing, heavy-duty freezer bags or vacuum-sealed packaging work well to keep moisture and odors out.
Meal Prep and On-the-Go Tips:
This classic apple pie is a fantastic make-ahead treat. Bake it a day or two in advance and store as recommended, then bring slices to potlucks, picnics, or packed lunches. Wrapped in parchment paper or foil and kept in a sturdy container, it travels nicely without losing its shape or moisture.
By following these simple storage tips, you’ll ensure that every slice of your homemade apple pie tastes just as heavenly on day two (or even day sixty!) as the moment it came out of the oven. So go ahead—bake that pie with confidence, knowing the love and comfort it brings can be savored again and again.
Behind the Recipe
Classic apple pie is more than just a dessert—it’s a slice of history and a symbol of home, Americana, and heartwarming tradition. Its roots trace back centuries, evolving through generations as settlers in America adapted recipes from Europe by using the abundant native apples and local ingredients. The phrase “as American as apple pie” reflects how deeply this dessert has become intertwined with American identity, embodying comfort, celebration, and the coming together of family.
Behind this particular recipe lies the timeless balance of tart Granny Smith apples and warming spices, a pairing that has delighted taste buds for ages. Each element—the flaky crust, the tender spiced filling, the buttery finish—echoes classic home baking techniques that have been passed down in kitchens far and wide. This apple pie isn’t just about flavor; it’s about tradition and the memories stirred by the very act of baking.
On a personal note, many of us recall the ritual of peeling apples alongside relatives, sharing stories while the pie slowly transformed in the oven, its inviting aroma weaving through the house. For some, apple pie is the dessert that marks the change of seasons—especially the crisp air of fall and cherished gatherings like Thanksgiving. Through its simplicity and familiarity, this recipe invites you into that rich tapestry, offering a delicious link to history, family, and the joy of creating something comforting from scratch.
In that way, your classic apple pie isn’t merely a dish on the table; it’s a shared experience—a piece of culinary heritage that continues to warm hearts, generation after generation.
FAQ
Can I use a different type of apple for this pie?
What’s the best way to make and store the pie crust ahead of time?
Can I make this pie gluten-free or vegan?
What’s the best way to reheat leftover apple pie?
Can I freeze the baked apple pie, and how do I thaw it properly?
How can I customize the spice flavors in the filling?
Is there a shortcut if I don’t have time to make the crust from scratch?
Your Turn in the Kitchen
There’s something truly timeless about a classic apple pie—the way the warm, spiced apples meet a flaky, buttery crust is pure comfort in every bite. This easy, irresistible recipe invites you to bring a little slice of nostalgia into your kitchen, whether it’s for a cozy family gathering or a simple treat to brighten your day.
We’d love to hear how your pie turns out! Feel free to leave a comment, share your favorite tweaks, or rate the recipe to help fellow bakers discover this delicious delight. Happy baking, and may your kitchen always be filled with the sweet aroma of apple pie!


