Mastering Avocado Cuts: Simple Steps from QVC Basics
Avocados have come a long way from their quirky nickname “alligator pear” to becoming a beloved staple in kitchens across America. But despite their popularity, many still find the art of choosing and cutting the perfect avocado a bit intimidating. In the YouTube video “Mastering Avocado Cuts: Simple Steps from QVC Basics,” viewers are guided through the essentials—from spotting a ripe avocado to speeding up the ripening process and mastering foolproof cutting techniques. Whether you’re prepping for a fresh salad, a creamy guacamole, or a beautiful sandwich topping, these straightforward tips make handling avocados effortless and enjoyable. Let’s dive into the simple yet satisfying steps that will turn you into an avocado-cutting pro in no time.
Choosing the Perfect Avocado Every Time Understanding Ripeness Through Color and Touch
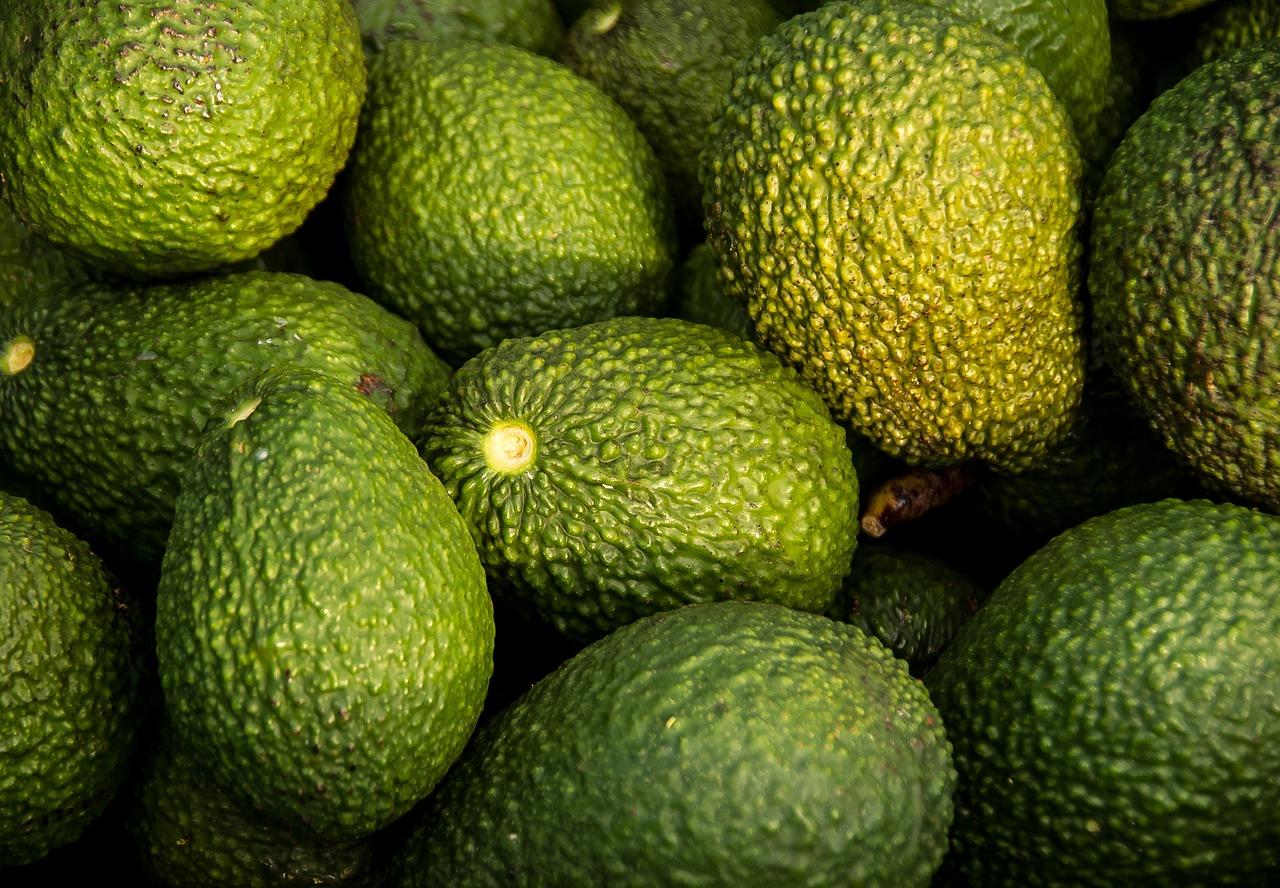
When it comes to picking the perfect avocado, color and touch are your two best guides. Avocados transition through distinct color phases—from deep green to dark purplish-black—as they ripen. For instance:
- Bright green: This avocado needs several days to ripen, ideal if you plan ahead.
- Breaking color: It’s moving towards peak ripeness and will be ready within 1-2 days.
- Perfect dark hue: Ready to eat now – the ultimate choice for immediate use.
- Overripe: Wrinkled and very dark, best suited for guacamole or cooked dishes.
Alongside visual cues, the squeeze test provides tactile confirmation. A ripe avocado should yield gently under a tender squeeze without feeling mushy or hard. Too firm means it needs a few days; too soft means it’s past perfect eating condition. And if you grab one home that’s a bit on the firmer side, slip it in a paper bag with a banana or apple. These fruits emit ethylene gas, a natural ripening agent that accelerates the process efficiently.
| Stage | Color | Ripeness Time | Best Use |
|---|---|---|---|
| Unripe | Bright Green | 3-5 Days | Wait, for future use |
| Breaking | Lightly darkening | 1-2 Days | Near-perfect, plan soon |
| Perfect | Dark purple-black | Ready now | Fresh eating, salads |
| Overripe | Very dark, wrinkled | Past prime | Guacamole, cooking |
Speeding Up Ripening Naturally Simple Hacks Using Everyday Fruit and Paper Bags
When those avocados you bring home are still a bit firm, don’t fret—there’s a clever yet natural trick to coaxing them into ripening faster. Simply grab a paper bag and tuck the avocado inside along with an apple or banana. These fruits emit a natural plant hormone called ethylene gas, which acts like a gentle accelerator for the ripening process. Close the bag loosely and let it work its magic. Within a day or two, your avocado will soften to that perfect buttery texture ideal for slicing or spreading.
Here’s a quick glance at how this method stacks up:
| Item | Effect on Ripening |
|---|---|
| Avocado alone | Slow ripening (5+ days) |
| Avocado + Apple (bagged) | Ripens in 2-3 days |
| Avocado + Banana (bagged) | Ripens in 1-2 days |
- Use a brown paper bag: It traps ethylene gently, unlike plastic that traps moisture and promotes mold.
- Choose an apple or banana: Both are champions in releasing ethylene gas.
- Check daily: Give a gentle squeeze to avoid overripening.
Employing this simple household hack not only saves time but also helps you savor that creamy, fresh avocado flavor exactly when you need it.
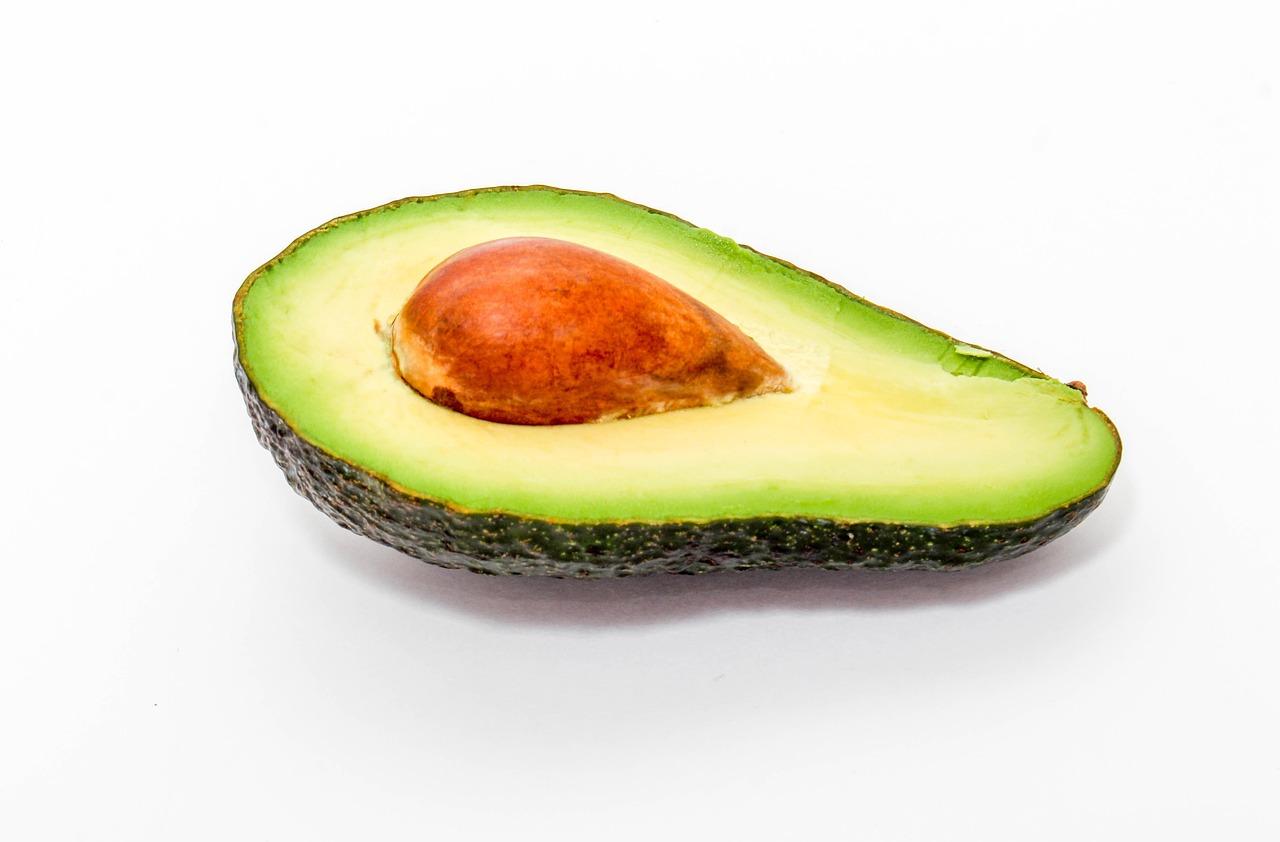
Safe and Smart Cutting Techniques Navigating the Pit and Slippery Flesh with Confidence
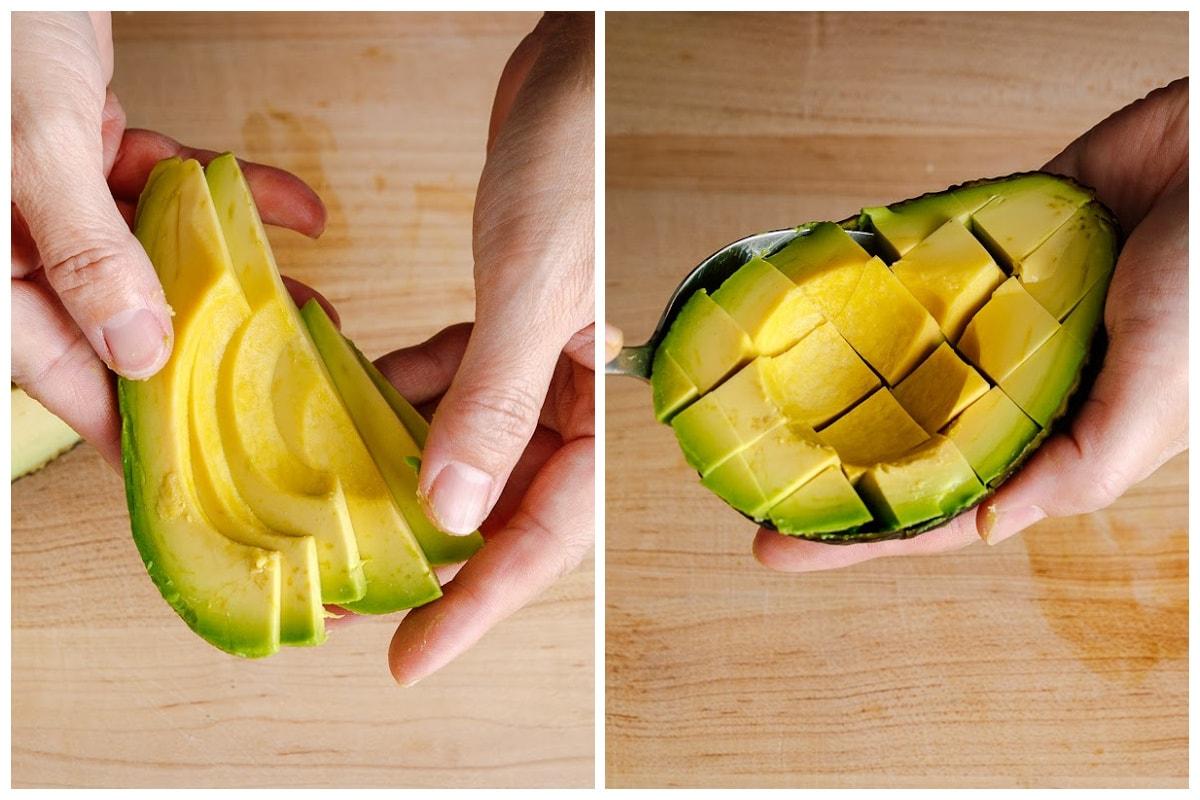
Mastering avocado cuts means approaching the slippery flesh and large pit with both caution and confidence. Start by slicing firmly around the avocado’s equator, rotating it gently until the knife completes the circuit. This neat technique helps you separate the two halves cleanly without digging into the flesh. Once halved, remove the pit safely by placing the avocado on a stable surface, then carefully tapping the pit with the knife’s edge before twisting it out. This method minimizes hand injuries and ensures you keep the flesh intact for those perfectly smooth slices.
To achieve flawless slices or dice, hold each half in your palm and cut gently through the flesh—but not through the skin—to maintain structural integrity. For slices, make long cuts lengthwise, then peel the skin away to reveal smooth, elegant results. For diced avocado, after making lengthwise cuts, rotate the avocado 90 degrees and slice again, creating a grid. Finally, slice the avocado half in two along one of your original cuts, then peel back the skin to reveal clean, uniform cubes. These simple yet smart steps guarantee every avocado cut is safe, precise, and aesthetically pleasing.
- Slice around the pit carefully
- Remove the pit on a flat surface
- Cut flesh, not the skin, for clean slices or dices
| Step | Tip | Result |
|---|---|---|
| Slice Around | Rotate gently for a clean cut | Two perfectly halved avocado halves |
| Remove Pit | Tap on a stable surface, twist off | Safe pit removal without damage |
| Slice/Dice | Cut flesh, avoid skin | Beautiful slices and tidy cubes |
Creative Slicing and Dicing Tips Transforming Your Avocado for Salads, Sandwiches, and More
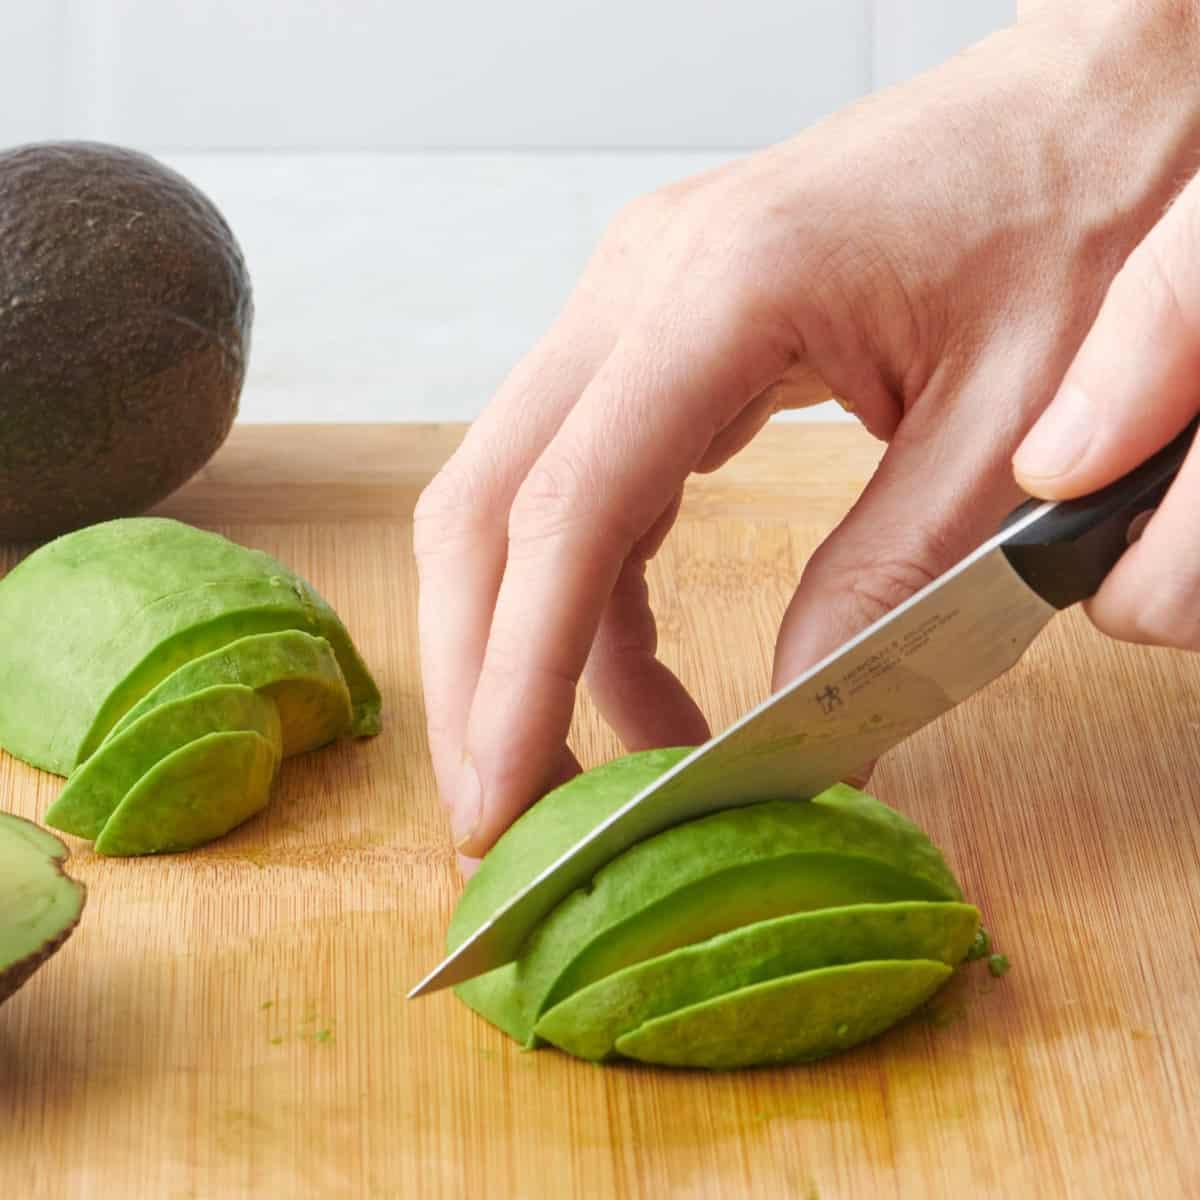
Transforming an avocado into perfect slices and dices is all about understanding its unique texture and structure. Start by cutting around the large, slippery pit, spinning the avocado with your knife to separate the two halves neatly. Once divided, gently remove the pit by embedding your knife into it and twisting slightly—it’ll pop out effortlessly. When slicing for a salad or sandwich, score the flesh crosswise but be sure not to cut through the skin. This method keeps the avocado intact while enabling clean, even slices that peel away effortlessly to reveal creamy, elegant segments.
Want to dice your avocado for a vibrant salad addition? The secret lies in layering your cuts. After slicing lengthwise, rotate the avocado 90 degrees and slice again, creating a crisp grid—all performed without piercing the skin. Then, cut the avocado halves again along your original slice to halve the diced sections, making peeling off the skin remarkably simple. This technique produces perfectly sized cubes that add texture and color to any dish, elevating everyday meals with that buttery, luscious green. Below is a quick reference for the cutting process:
| Step | Action | Tip |
|---|---|---|
| 1 | Cut around the pit | Spin avocado to slice evenly |
| 2 | Remove pit | Embed knife and twist gently |
| 3 | Score flesh lengthwise | Keep skin intact |
| 4 | Score flesh crosswise | Form grid for dicing |
| 5 | Peel skin away | Peel off easily in large chunks |
Insights and Conclusions
And there you have it—mastering the art of avocado cuts is simpler than you might think. From choosing the perfect fruit by color and feel, to gently speeding up ripening with a handy paper bag trick, and finally slicing and dicing with confidence, these basics unlock the full potential of America’s beloved alligator pear. Whether you’re prepping for a fresh salad, a creamy guacamole, or a tasty sandwich topping, these straightforward steps ensure you’ll enjoy every buttery bite with ease. So next time you pick up an avocado, remember these tips and turn what once seemed tricky into your new kitchen superpower!