Mastering Nachos: Basic Tips for Perfect QVC Snack Magic
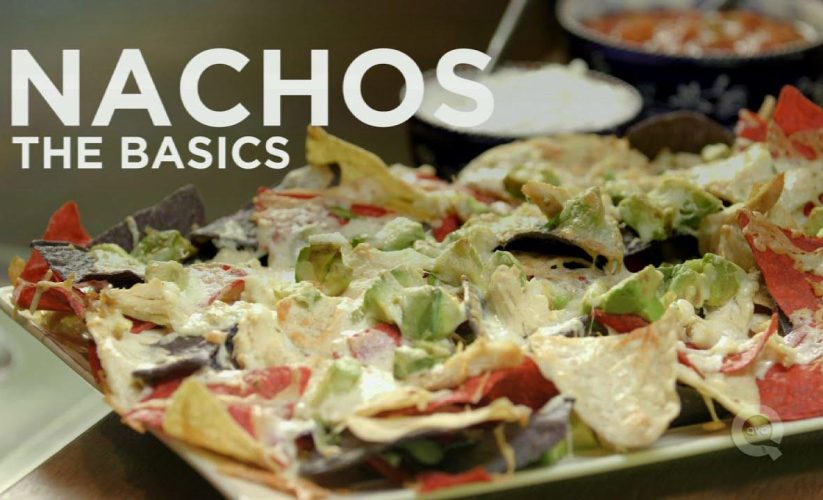
Nachos are undeniably one of the most beloved snacks, perfect for sharing—or savoring solo—whether it’s game day, movie night, or just a casual get-together. But while making good nachos is easy enough, elevating them to the realm of greatness takes a bit more finesse. That’s exactly what the YouTube video “Mastering Nachos: Basic Tips for Perfect QVC Snack Magic” explores. From choosing the right chips and freshly grating your cheese to smart layering techniques and quick baking tricks, this guide serves up straightforward yet clever advice to transform your nacho game. Whether you’re a novice or a seasoned snack lover, these tips promise to help you create perfectly melty, crunchy, and flavorful nachos that will wow your friends and family every time. Let’s dig into the essentials of nacho mastery!
Choosing the Perfect Base: How to Select Chips and Cheese for Ultimate Nacho Texture and Flavor
When it comes to choosing chips for nachos, thickness is everything. Opt for sturdy, thick-cut corn chips that can confidently hold a generous pile of toppings without turning to dust in the oven. Thin or overly crispy chips tend to snap or lose their crunch, leaving you with a soggy, disappointing bite. A robust chip acts like a canvas, making sure every layer—from cheese to chicken—is perfectly supported. If you want that true nacho experience, look for chips that have a strong, rough texture that can soak up the flavors without wilting under pressure.
Cheese selection is an art form in itself. Always grate your own cheese to avoid pesky anti-caking additives found in pre-shredded varieties, which can hinder meltability. Combine creamy Monterey Jack with a touch of spicy Pepper Jack to create a balance of smooth meltiness and a subtle kick. Mixing cheeses not only enhances flavor but adds visual appeal with flecks of color and varying textures. Layer your cheese thoughtfully between chip layers to ensure every bite gets its share of gooey, cheesy goodness—because no chip deserves to be king without its crown of cheese.
| Chip Attribute | Why It Matters |
|---|---|
| Thickness | Prevents breakage, supports toppings |
| Texture | Holds flavors, resists sogginess |
| Flavor | Neutral base to highlight cheese & toppings |
| Cheese Type | Purpose |
|---|---|
| Monterey Jack | Smooth melt, mild flavor |
| Pepper Jack | Spicy kick, visual contrast |
| Cheddar (optional) | Sharpness, classic taste |
Layering Like a Pro: Building Balanced Nachos for Even Cheese Coverage and Taste
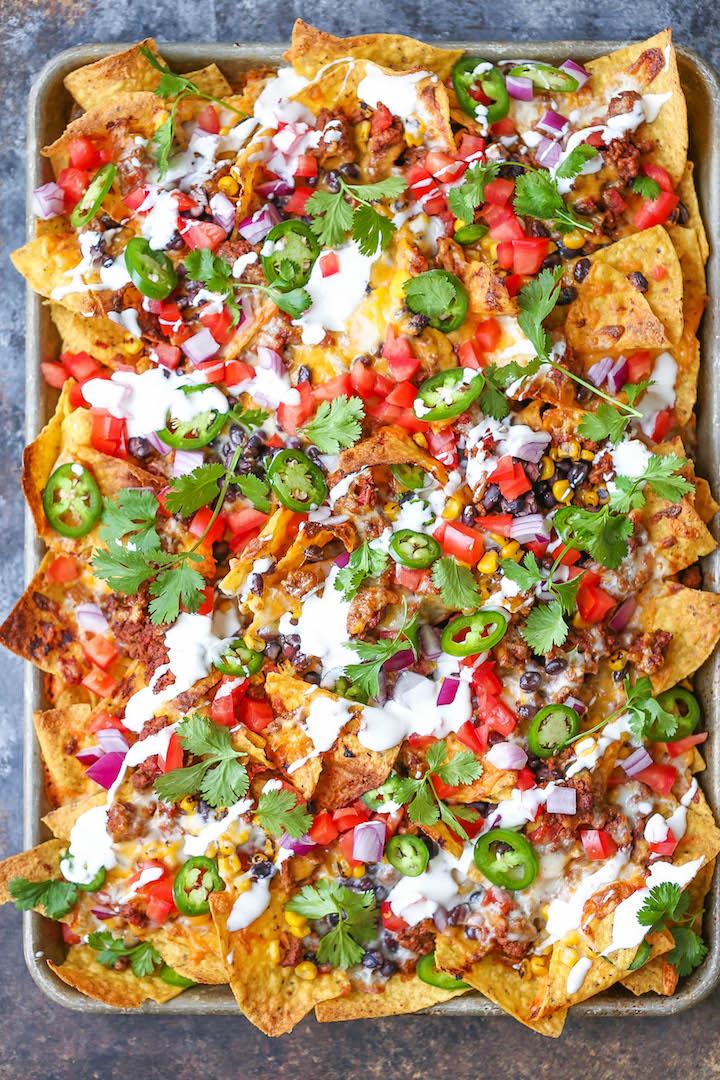
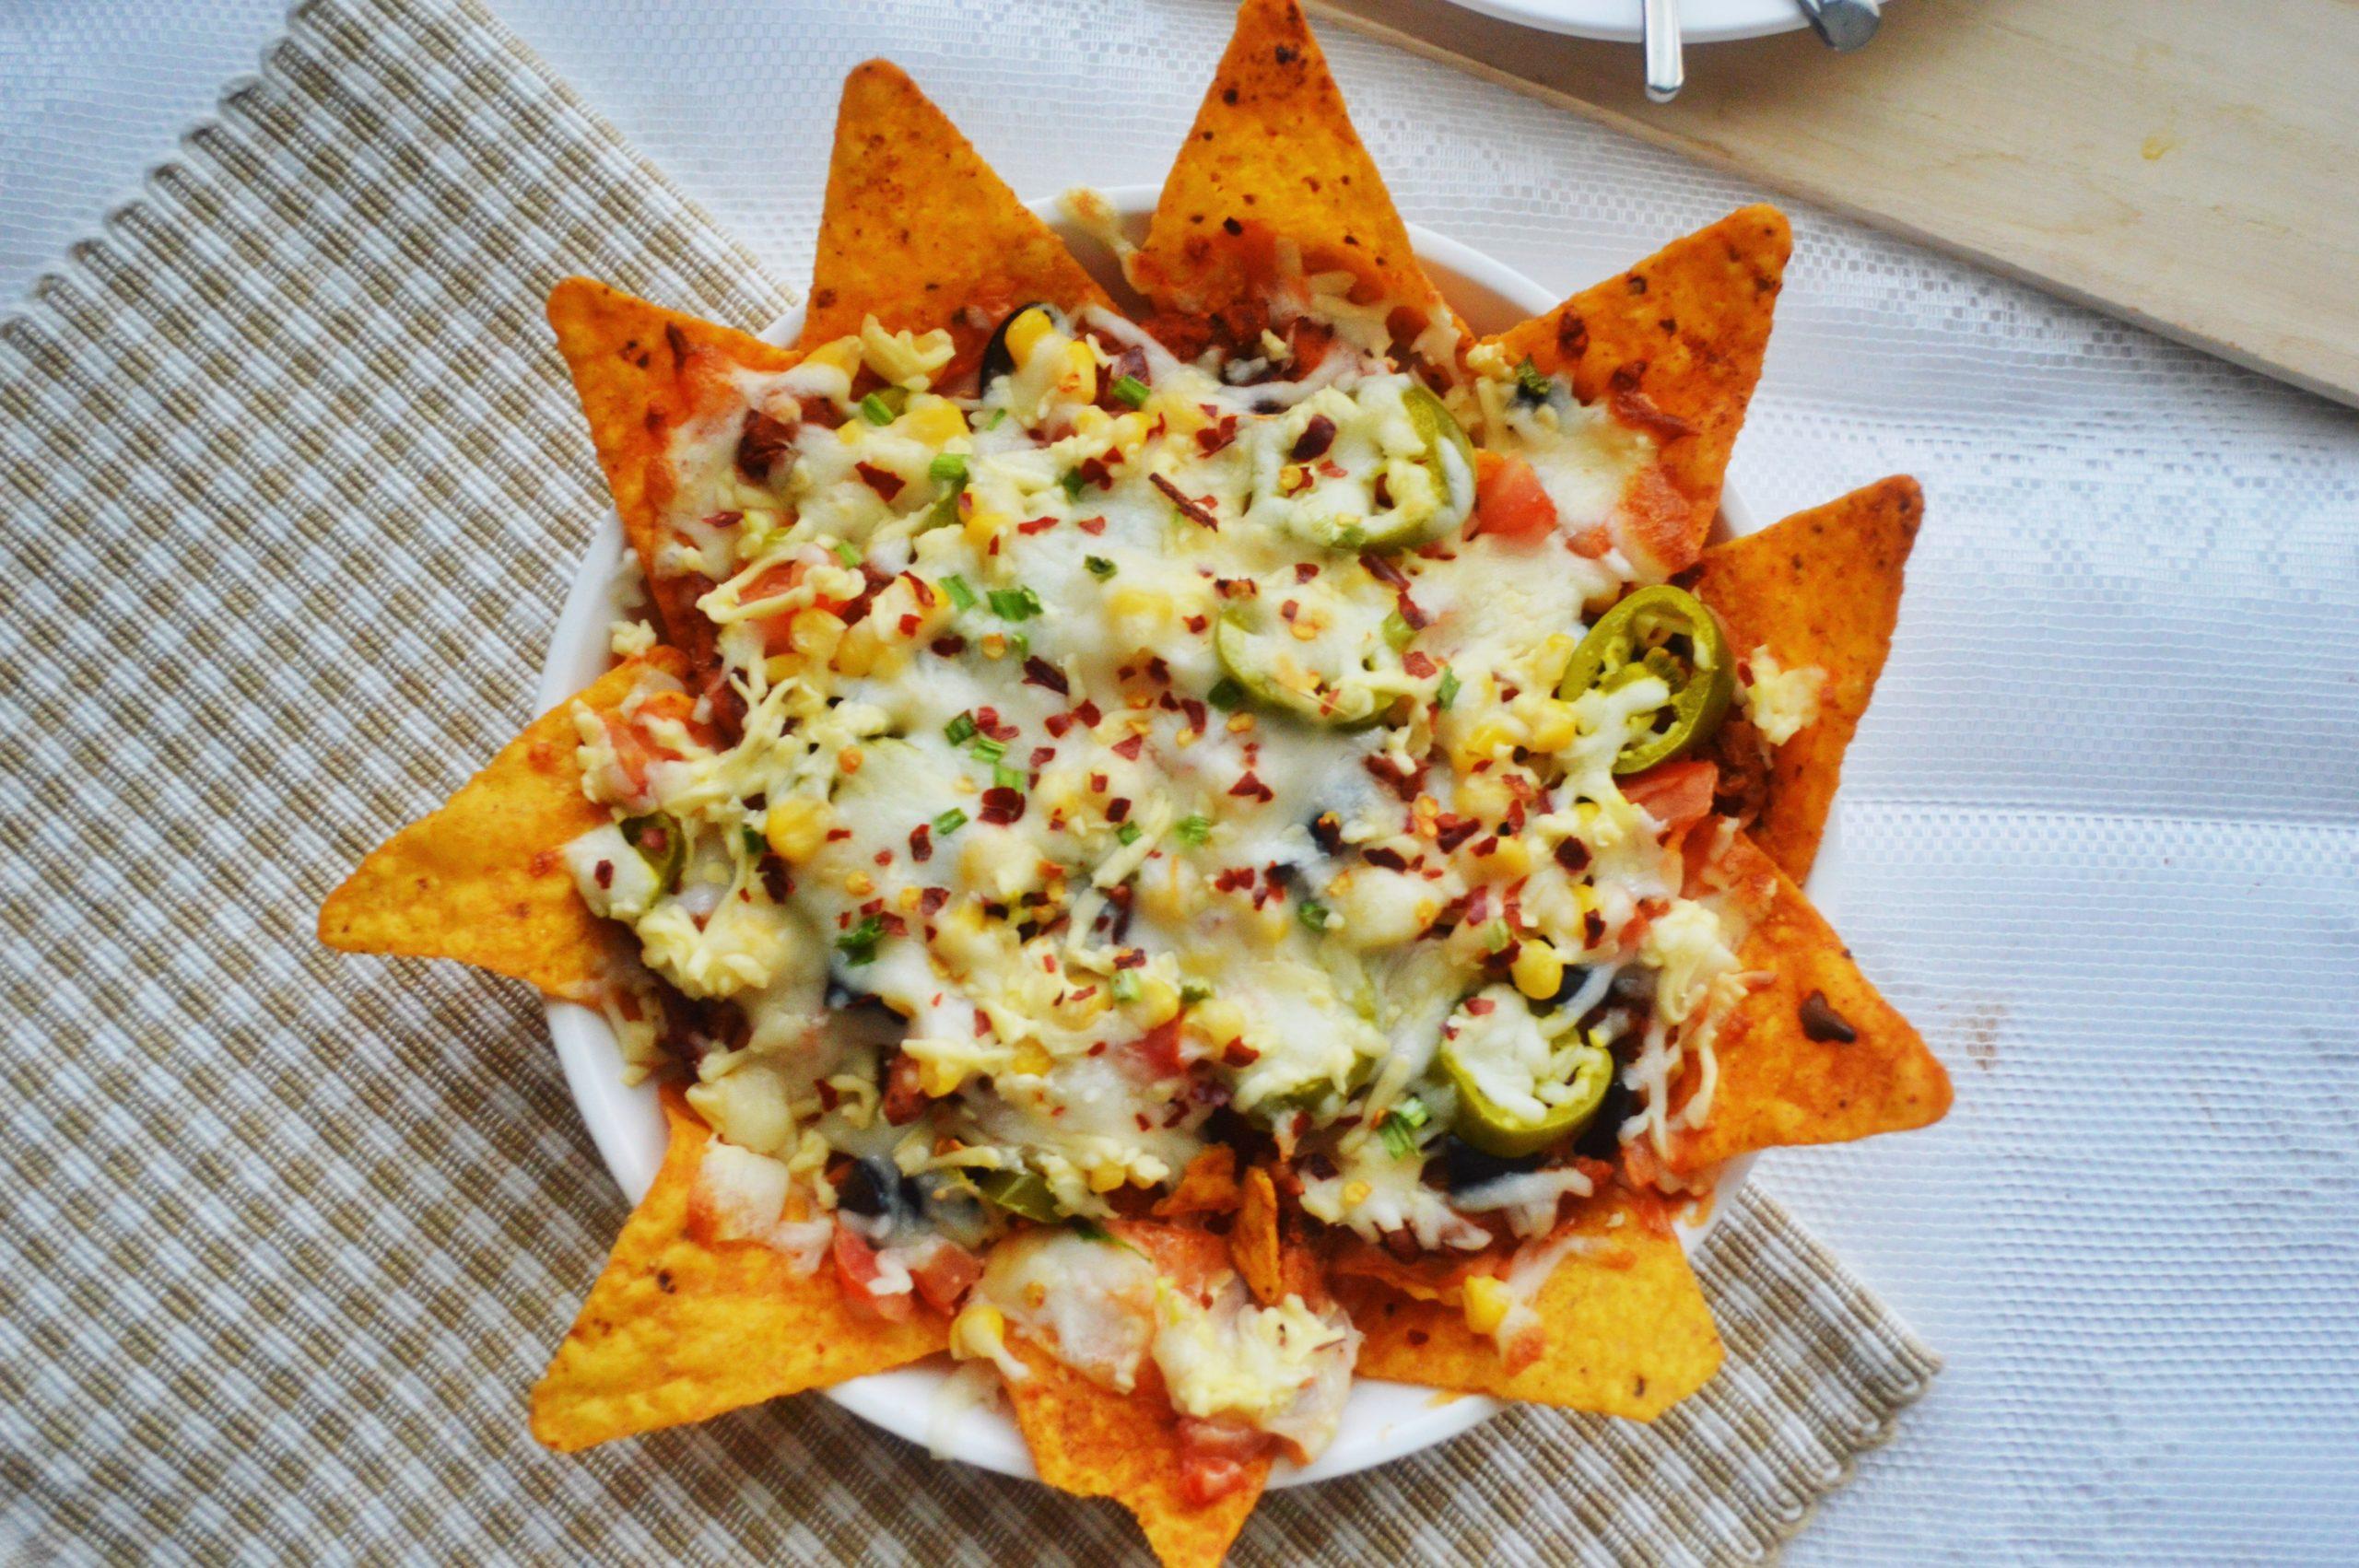
Achieving perfectly balanced nachos starts with smart layering. Rather than dumping all your chips on the pan and topping them with a mountain of cheese, build your masterpiece layer by layer. Begin by spreading a single even layer of sturdy, thick corn chips—these hold up best under the toppings without breaking or turning brittle. Next, scatter a generous handful of your pre-cooked protein, avocado slices, and fresh green onions. Then, grate a mix of Monterey Jack and Pepper Jack cheeses right onto this base layer to save cleanup and ensure every chip gets its share. Repeat this with another layer of chips, toppings, and cheese, making sure not to skimp on the melt-worthy cheese in between. This method guarantees that even the bottom chips soak up all the cheesy goodness, avoiding the dreaded dry bites.
Once your layers are built, a quick 10-minute bake at 350°F brings the flavors together beautifully. The dual cheese layers melt perfectly through the chips, creating that dreamy, gooey texture without sogginess. To keep track of your layering game, use this simple table as a guideline:
| Layer | Ingredients | Tips |
|---|---|---|
| 1 | Chips, cooked chicken, avocado, green onion, cheese | Grate cheese directly onto ingredients for even coverage |
| 2 | Chips, chicken, avocado, green onion, more cheese | Don’t hesitate to use all toppings—this is flavor central! |
Remember, the goal of layering is to ensure every bite is loaded with flavor and cheese. With this pro approach, even the chips hiding at the bottom get their moment to shine.
Prepping Toppings and Timing: Cooking Proteins Ahead and Managing Oven Temps for Perfect Melting
When preparing proteins for your nachos, cooking ahead is key. Proteins like chicken should be fully cooked before making your nachos because the brief time in the oven won’t be enough to cook raw meat. This ensures juicy, flavorful bites without the risk of undercooked pieces. Once cooked, chop or shred the protein into bite-sized pieces so each chip gets its share of meaty goodness. Remember, layering your ingredients thoughtfully makes all the difference—distribute chicken evenly across layers rather than piling it all on one spot to avoid an uneven flavor experience.
Managing the oven temperature is just as crucial. Setting the oven to 350°F provides the perfect balance to melt cheese thoroughly while crisping the corn chips to just the right crunch. Aim for about 10 minutes in the oven; this melts multiple layers of cheese evenly without turning the chips soggy or burnt. For a seamless process, use a baking sheet lined with a silicone mat—this allows you to slide your perfectly layered nachos straight onto a serving platter with zero fuss. Below is a quick handy guide for timing and temperature to keep by your kitchen station:
| Step | Oven Temp | Cook Time | Tip |
|---|---|---|---|
| Preheat Oven | 350°F | 5-10 min | Prepare all ingredients first |
| First Layer Bake | 350°F | 10 min | Melt cheese & crisp chips |
| Reheating Precooked Protein | 350°F | Just enough to warm | Avoid drying out protein |
Serving with Style: Easy Hacks for Transferring and Presenting Nachos That Impress
When it comes to transferring nachos from oven to table, the secret weapon is a silicone liner. Lining your baking sheet with silicone not only prevents sticking but allows you to slide the nachos off effortlessly, keeping the perfect layered look intact. Use a wide, thin spatula to gently lift the entire sheet of nachos and ease them onto a stylish serving platter—this keeps your presentation clean and impressive without disturbing any toppings. Opt for a platter with handles so you can carry your snack masterpiece with ease and serve in style, encouraging that perfect QVC snack magic moment.
Presentation is all about layering and visual appeal—don’t mound chips and drown them under toppings. Instead, layer chips, chicken, avocado, and cheese in alternating tiers to reach every bite with equal flavor and crunch. Here’s a quick layout guide to layering your ingredients like a pro:
| Layer | Ingredients | Tip |
|---|---|---|
| 1 | Thick corn chips, diced chicken, avocado, green onions, grated Monterey Jack | Grate cheese directly on to save time and dishes |
| 2 | More chips, chicken, avocado, green onions, mix of Monterey & Pepper Jack cheese | Use a blend of cheeses for flavor and visual interest |
- Layer evenly: Every chip should be cheesy and topped, no chip left behind.
- Cook toppings in advance: Pre-cooked chicken ensures rapid oven melting and warm, juicy bites.
- Finish with fresh add-ons: Serve with sour cream and salsa for that perfect balance.
The Conclusion
And there you have it—a simple yet savvy guide to transforming basic nachos into a mouthwatering masterpiece. From choosing the perfect sturdy chips to mixing your own blend of melty cheeses and thoughtfully layering every ingredient, these tips unlock the secret to that ideal balance of crunch and gooey goodness. Whether you’re prepping a quick snack or crafting a show-stopping platter for friends, mastering these small details will take your nacho game from good to unforgettable. So, preheat that oven, gather your favorite toppings, and get ready to savor the snack magic that’s waiting just a few layers away!