Crispy Homemade Samosas: Easy, Vegan, and Kid-Friendly Delight
Crispy Homemade Samosas: Easy, Vegan, and Kid-Friendly Delight
🌍 Cuisine: Indian
⚙️ Difficulty: Easy
Ingredients
- 2 cups all-purpose flour
- 1/4 cup vegetable oil (for dough)
- 1/2 tsp salt (for dough)
- Water as needed (for dough)
- 3 medium potatoes, boiled and mashed
- 1 cup green peas (fresh or frozen)
- 1 tbsp vegetable oil (for filling)
- 1 tsp mustard seeds
- 1 tsp cumin seeds
- 1-2 green chilies, finely chopped (optional)
- 1 tsp grated ginger
- 1/2 tsp turmeric powder
- 1 tsp garam masala
- 1 tsp chaat masala (optional)
- Salt to taste (for filling)
- Fresh cilantro, chopped (2 tbsp)
- Oil for deep frying
- 1 tbsp lemon juice
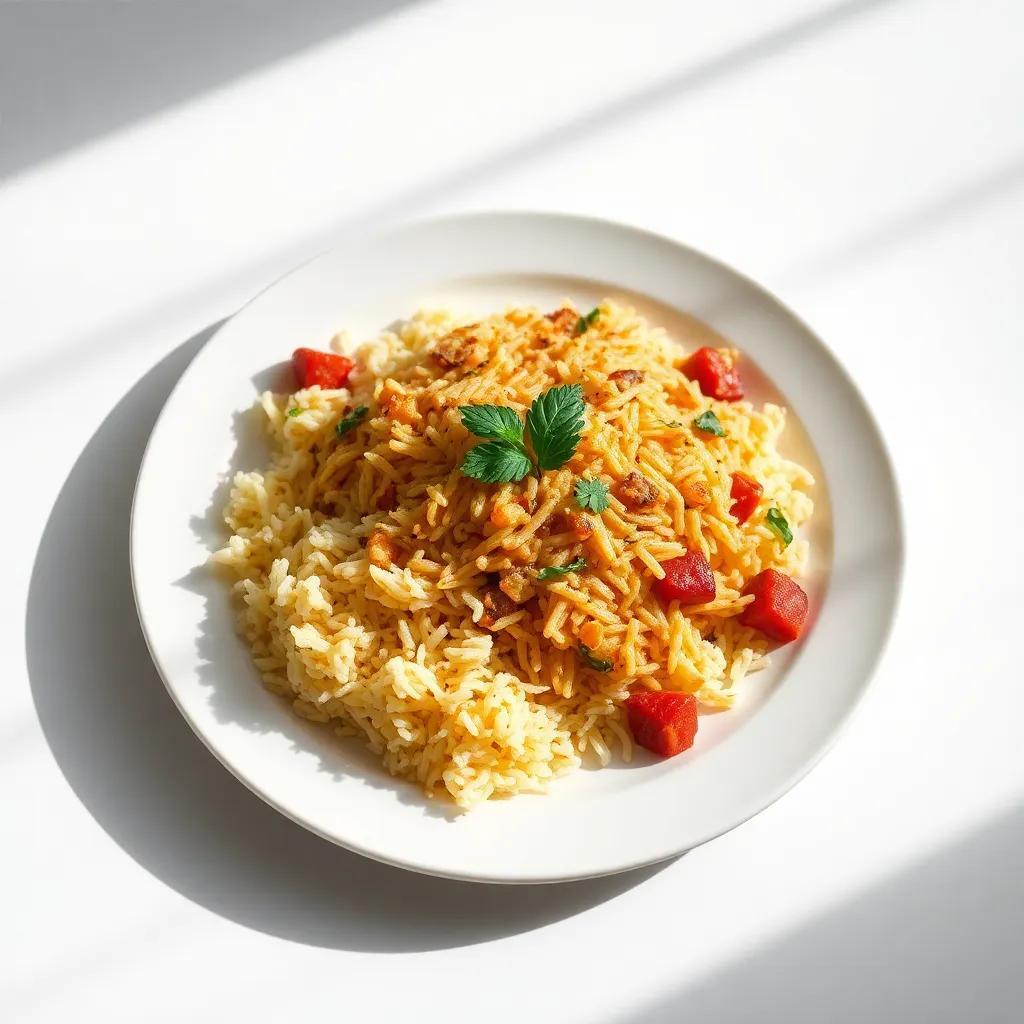
Nutrition Facts
180
Instructions
- In a large mixing bowl, combine all-purpose flour, salt, and 1/4 cup vegetable oil. Gradually add water and knead into a smooth, firm dough. Cover and let rest for 20 minutes.
- While the dough rests, prepare the filling. Heat 1 tbsp vegetable oil in a pan over medium heat.
- Add mustard seeds and cumin seeds. When they start to splutter, add chopped green chilies and grated ginger. Sauté for 1-2 minutes.
- Add green peas and cook for 5 minutes until tender (if using frozen, thaw first). Then add turmeric powder, garam masala, chaat masala, and salt. Stir well.
- Mix in the boiled and mashed potatoes. Cook the mixture for another 3-4 minutes. Turn off heat and stir in fresh cilantro and lemon juice. Let filling cool.
- Divide the dough into 16 equal portions. Roll each portion into a ball, then flatten into a thin oval or circle (about 5-6 inches in diameter).
- Cut each rolled dough circle in half to make two semi-circles.
- Take one semi-circle, fold it into a cone shape by bringing the straight edge corners together, and seal with a little water.
- Fill the cone with 1-2 teaspoons of the filling, then moisten the edges and pinch them together to seal the samosa completely.
- Repeat with remaining dough and filling.
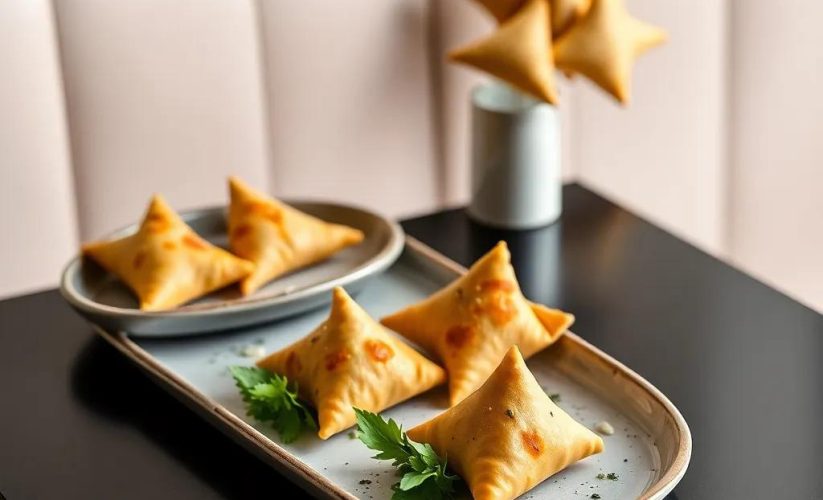
- Heat oil in a deep frying pan over medium heat. When hot, fry samosas in batches until golden brown and crispy, about 3-4 minutes per batch. Drain on paper towels.
- Serve hot with mint chutney, tamarind sauce, or ketchup as preferred.
Serving Suggestions
- Serve samosas hot with tangy tamarind chutney or refreshing mint-cilantro chutney.
- Pair samosas with masala chai for a cozy afternoon snack.
- Include samosas as appetizers in an Indian-themed dinner party.
- Enjoy samosas with a side of plain yogurt or vegan raita to balance the spices.
- Serve alongside a fresh salad made with cucumber, tomato, and onion for added crunch and freshness.
- Pack samosas for picnics or kid’s lunch boxes as a tasty treat.
- Accompany samosas with a mild vegetable curry for a more filling meal.
Table of Contents

Intro
There’s something truly magical about sinking your teeth into a crispy, golden samosa—its delicate crunch giving way to a warm, flavorful filling that comforts and excites the palate all at once. This homemade samosa recipe brings that magic right into your kitchen with an easy-to-follow approach perfect for cooks of all levels. Whether you’re looking for a crowd-pleasing appetizer for a family gathering, a fun weekend activity to involve the kids, or a satisfying vegan snack that doesn’t compromise on taste or texture, these samosas fit the bill effortlessly.
What makes this recipe especially inviting is how approachable it is: from kneading the dough to frying the final pockets, the steps are straightforward, making it a rewarding project rather than a daunting task. Plus, the results boast that irresistible crispiness that takes store-bought versions to another level, all while letting you enjoy the freshness and customization that only homemade cooking can offer.
Ideal for festive occasions, casual get-togethers, or simply a cozy teatime treat, these samosas bring warmth and joy to the table—no exotic equipment or complicated techniques required. They’re as much about the process as the result, inviting you to savor every moment of making and sharing this beloved Indian classic with your friends and family.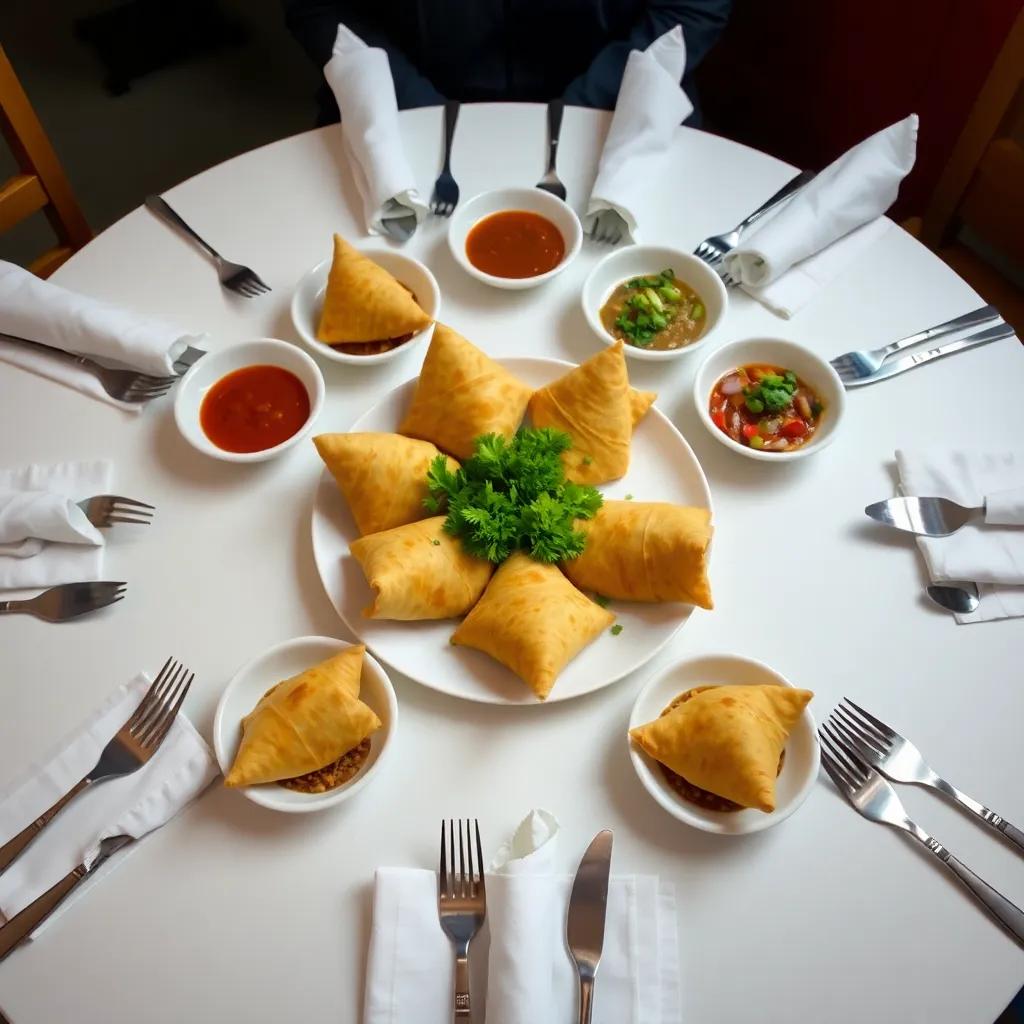
Ingredient Notes
When it comes to crafting the perfect samosa, a few key ingredients play starring roles in creating that iconic taste and texture. Understanding these essentials helps elevate your homemade samosas from simply good to truly memorable.
All-Purpose Flour: This forms the sturdy yet tender shell that encases the filling. Opt for a good-quality all-purpose flour that’s finely milled, as this ensures a smooth dough that’s easier to roll out thinly without tearing. If you want a slightly flakier crust, you can substitute a portion of the flour with pastry flour or add a pinch of semolina (sooji) for extra crispness. However, for the classic samosa crunch and flexibility, plain all-purpose flour remains the ideal choice.
Mustard Seeds and Cumin Seeds: These spices are the backbone of the tempering that flavors the filling. When heated in oil, mustard seeds pop energetically, releasing their sharp, pungent aroma, while cumin adds an earthy depth. Fresh, whole seeds work best—avoid pre-ground versions here to capture that lively, fresh burst of flavor. You can find these seeds in most grocery stores or at international spice markets. If you don’t have mustard seeds, a pinch of mustard powder can be used, but the textural pop will be missing.
Turmeric Powder: More than just a color agent, turmeric imparts a subtle warmth and a gentle bitterness that balances the earthiness of the potatoes and peas. Choose bright golden turmeric powder that’s freshly ground for maximum vibrancy and health benefits. Look for airtight packaging to keep it potent and avoid any dull, faded powders that signal staleness.
Fresh Cilantro and Lemon Juice: These finishing touches bring brightness and freshness to the filling, cutting through the richness of the fried samosas. Fresh cilantro (coriander leaves) adds a vibrant herbaceous note, while a splash of lemon juice introduces a pleasant zing. When shopping, pick vibrant, leafy bunches with no yellow or wilted leaves, and use lemon juice from fresh lemons rather than bottled whenever possible — the fresh acidity celebrates the filling’s complex spices beautifully.
By paying close attention to these standout ingredients—from flour quality to the freshness of herbs and spices—you set yourself up for samosas that are crispy, flavorful, and delightfully balanced in every bite. And if you ever find yourself without one of these key players, simple swaps and thoughtful tweaks ensure your samosas remain a crowd-pleaser without missing a beat.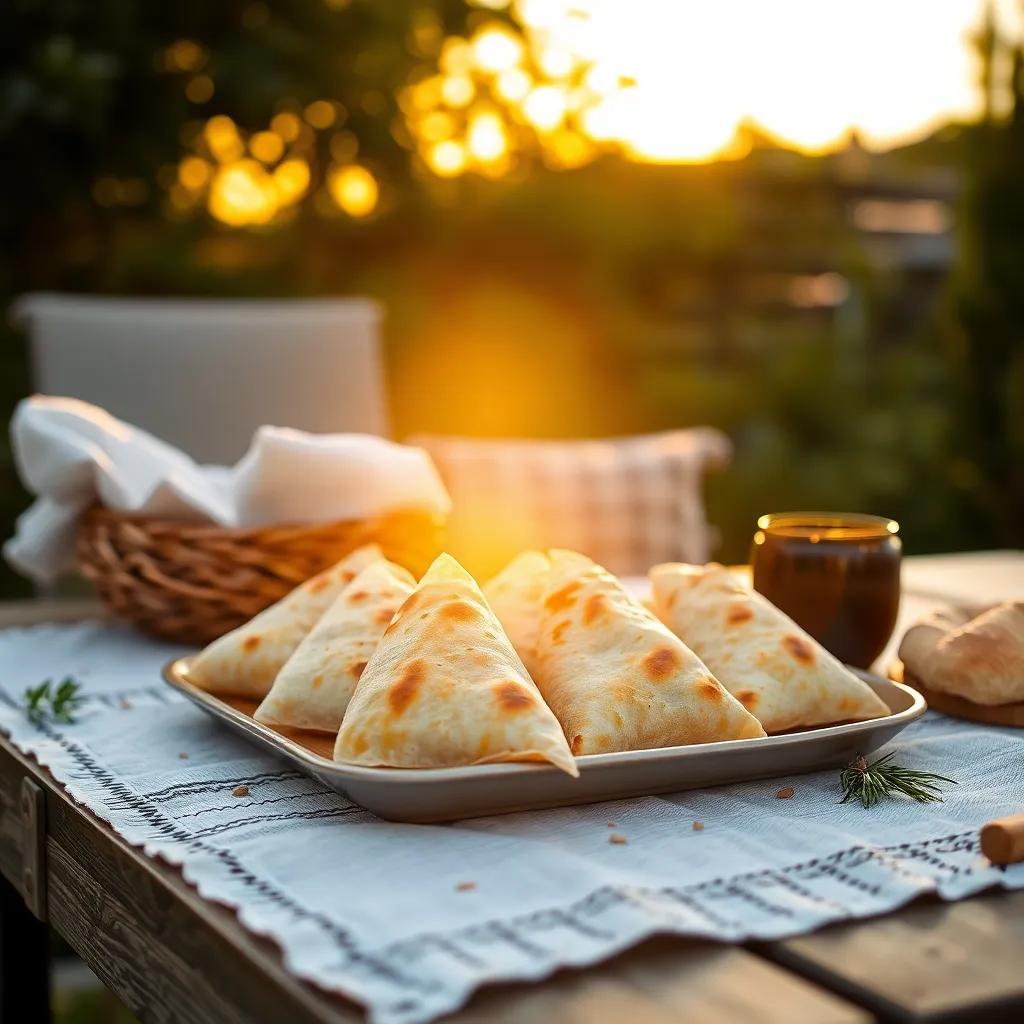
Tips & Variations
Mastering the art of crispy samosas at home can be as fun as it is rewarding, and with a few expert tips, you’ll elevate your samosas from great to unforgettable. First, when kneading your dough, aim for a firm yet pliable texture—it shouldn’t be too soft or sticky. If your dough feels too dry, add water sparingly, one tablespoon at a time, to avoid a tough crust. Letting the dough rest undisturbed for at least 20 minutes is crucial; this relaxes the gluten and makes rolling smoother, resulting in thinner and crisper samosa shells.
When shaping the samosas, try to roll the dough evenly and avoid making it too thick. Thicker shells reduce the crunch and make frying take longer, causing excess oil absorption. Use a sharp knife to cut neatly and seal the edges firmly with water—taking care to press out any air pockets—to prevent filling leakage during frying.
Speaking of frying, controlling oil temperature is the secret weapon for gorgeous golden samosas. Keep the oil heated to a steady medium heat—too hot and the samosas burn on the outside while staying raw inside; too cool and they soak up oil, becoming greasy. Test by frying a small piece of dough first. Use a deep, heavy-bottomed pan for better temperature consistency and fry in small batches to avoid overcrowding.
For those seeking creative spins or adaptations, this recipe offers wonderful flexibility:
- Filling Variations: Swap or mix in diced carrots, finely chopped spinach, or cooked lentils for a colorful and nutrient-rich twist. For a heartier version, add cooked chickpeas or tofu crumbles seasoned with the same spices. If you like it spicy, experiment with adding a pinch of red chili powder or a dollop of harissa for a smoky heat.
- Gluten-Free Option: Substitute all-purpose flour with a blend of rice flour and chickpea (gram) flour to maintain crispness; however, you’ll need to adjust water quantities and handle the dough gently, as gluten-free dough tends to be less elastic. Alternatively, use pre-made gluten-free samosa wrappers if available, adapting the folding and sealing method accordingly.
- Baking Instead of Frying: For a lighter take, brush prepared samosas lightly with oil and bake them at 400°F (200°C) on a parchment-lined tray for 25-30 minutes, flipping halfway through until golden and crisp. While they won’t have exactly the same crunch as fried ones, baking reduces oil use and still delivers satisfying crispiness.
- Air-Fryer Friendly: Air fryers work wonderfully for samosas. Preheat to 375°F (190°C) and cook in batches for about 12-15 minutes, turning halfway, to get crisp, evenly browned samosas with less oil. Just spray or brush them lightly with oil first.
- Make Ahead & Freezing Tips: Assemble samosas ahead of time and freeze them uncooked on a tray before transferring to airtight bags. When ready, fry or bake directly from frozen, adding a couple of extra minutes to cooking time. This strategy is a lifesaver for entertaining or busy days.
To cater to kids or milder palettes, reduce or omit the green chilies and chaat masala. Alternatively, incorporate a pinch of mild smoked paprika for a subtle north-south flavor balance without overwhelming heat. Feel free to swap fresh cilantro with fresh mint for a different, refreshing herbal note.
Finally, don’t shy away from pairing these samosas with a variety of dips and chutneys beyond the classics—try tamarind-date chutney for sweetness, a cooling coconut chutney, or even a spicy mango salsa. These add layers of flavor and make each bite excitingly different.
By experimenting with these tips and variations, you can tailor your crispy homemade samosas to suit every mood, occasion, and dietary need—turning this beloved snack into a versatile culinary canvas.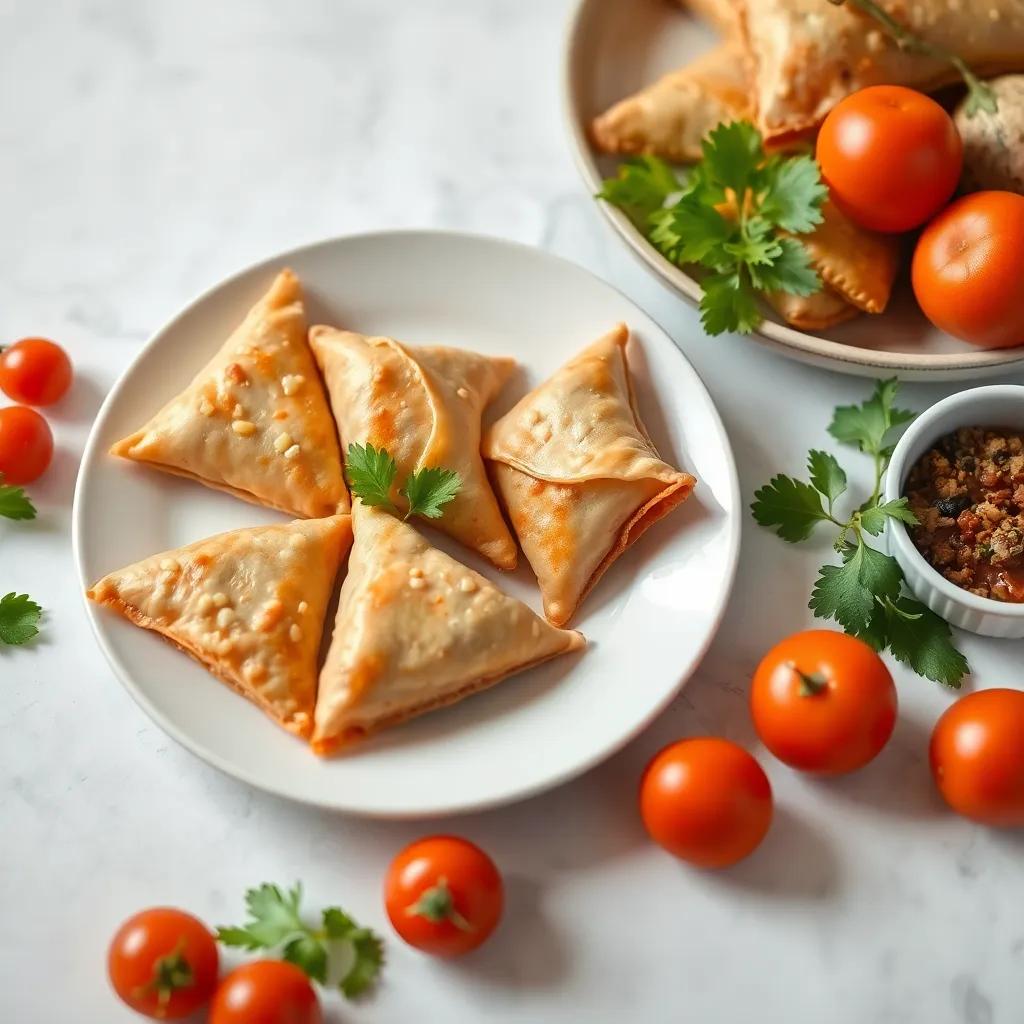
Leftovers & Storage
After enjoying your batch of crispy homemade samosas, it’s natural to wonder how best to preserve the leftovers without sacrificing that delightful crunch and vibrant filling. Proper storage ensures your samosas stay fresh, flavorful, and safe to eat—whether you plan to savor them the next day or weeks down the line.
For short-term storage, place cooled samosas in an airtight container lined with paper towels to absorb any residual moisture. Store them in the refrigerator where they will stay fresh for up to 2–3 days. Reheating refrigerated samosas is best done in an oven or air fryer at around 350°F (175°C) for 8–10 minutes to help restore their crispiness; avoid microwaving if possible, as it tends to soften the pastry and makes the samosas soggy.
If you want to keep samosas for longer, freezing is a fantastic option. Allow the freshly fried or uncooked samosas to cool completely. Then, arrange them in a single layer on a baking sheet lined with parchment paper and freeze until solid (about 1–2 hours). Once frozen, transfer them to a freezer-safe zip-top bag or airtight container, separating layers with parchment paper to prevent sticking. Properly stored, frozen samosas can last up to 2 months without losing quality.
When it’s time to enjoy frozen samosas, it’s ideal to cook them directly from frozen rather than thawing to preserve texture and reduce oil absorption. Deep fry them at medium heat, allowing a minute or two extra cook time, or bake/air fry until heated through and crispy. This method keeps the samosas from becoming overly greasy or limp.
For those who love meal prepping or packing lunchboxes, samosas are an excellent make-ahead snack. They travel well when kept in insulated containers accompanied by chutneys stored separately to avoid sogginess. Just be sure to gently reheat them and enjoy fresh whenever possible for the best experience.
In summary:
- Refrigerate: Cool samosas in an airtight container with paper towels; keep up to 2–3 days.
- Freeze: Freeze single-layered, then store airtight; keep up to 2 months.
- Reheat: Oven or air fryer preferred for crunch; avoid microwave reheating.
- Cook from frozen: When frozen uncooked or cooked, cook directly from the freezer for best texture.
- Meal prep friendly: Ideal for packed lunches or entertaining; separate chutneys and reheat before serving.
By following these storage tips, you can enjoy your delicious vegan samosas whenever cravings strike, without compromising on that signature crispy bite each and every time.
Behind the Recipe
Samosas carry centuries of culinary tradition woven into their crispy folds, tracing back to the bustling markets and royal kitchens of medieval India and Central Asia. Originally called “samsa” in Persian, these stuffed pastries journeyed across cultures, evolving from savory meat-filled pockets to the vegetarian and vegan delights so widely loved today. This recipe honors that rich heritage while making the samosa approachable for modern home cooks—especially those seeking a kid-friendly, plant-based version.
For many families in India, samosas are more than just snacks; they represent moments of togetherness. The act of rolling dough, folding delicate cones, and filling each parcel often becomes a shared ritual at festivities, chai-time conversations, or casual weekend gatherings. This recipe was inspired by those warm, communal experiences passed down through generations, crafted to capture the comforting familiarity and vibrant flavors in a simple yet authentic way.
The choice to keep this recipe vegan echoes both tradition and contemporary lifestyle trends. While meat fillings have their place, the potato and pea combination stands as a beloved classic across regions and households, showcasing how humble ingredients can transform into something celebratory. The addition of fragrant spices, fresh herbs, and bright lemon juice balances richness with freshness, reflecting the thoughtful layering that’s key to authentic Indian cooking.
By making samosas from scratch—even without specialty flours or exotic equipment—you connect with a culinary story that spans continents and centuries. Each crispy, fragrant bite tells that story, inviting you to savor not just a delicious treat but a piece of living culture that continues to bring joy across tables and generations worldwide.
FAQ
Can I make the samosa filling ahead of time?
What can I use if I don’t have all-purpose flour for the dough?
How do I make sure my samosas turn out crispy and not soggy?
Can I freeze samosas before or after cooking?
Is there a way to add a bit more protein to the filling?
Can I bake samosas instead of frying them?
How kid-friendly is this samosa recipe, and can I adjust the spices?
Try It Yourself
There’s something truly special about biting into a golden, crispy samosa that’s packed with wholesome, flavorful goodness—especially when it’s easy, vegan, and a hit with the kids. This recipe brings all those delightful elements together, making homemade samosas not just a treat, but a fun kitchen adventure for the whole family.
Ready to give it a try? We’d love to hear how your samosas turn out! Drop a comment, share your favorite filling twist, or rate the recipe to help fellow food lovers discover this tasty delight. Happy cooking and happy snacking!